If you know how JPEG works, then you know that JPEG files contain quantization tables, which are a table of values that the DCT (Discrete Cosine Transform) coefficients of a certain block of an uncompressed image file are divided by and rounded to the nearest integer. These tables contain values determined by software such as Photoshop, which sets the quality of the compressed image. Higher values in the quantization table result in more aggressive compression, leading to lower image quality, while lower values result in less compression and higher image quality.
JPEG employs separate quantization tables for chrominance (colour) and luminance (brightness) to take advantage of the human visual system’s varying sensitivity to different types of information. Typically, the chrominance table has higher values than the luminance table because the human eye is less sensitive to colour details than brightness details. This means that higher frequency details in colour can be compressed more without a significant perceived loss in quality. By optimising the compression process, JPEG achieves a good balance between file size and image quality.
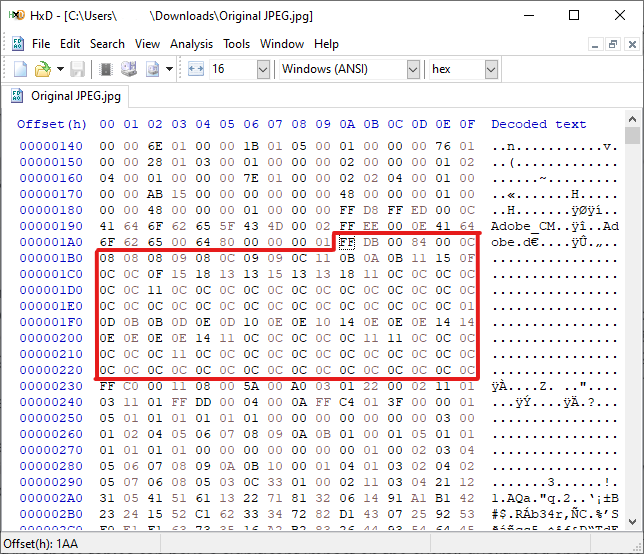
The quantization tables need to be stored inside the JPEG file, because the decoding software, such as the Photos app on Windows, needs to use those values to decompress and display the image. I aimed to access the tables inside those files by looking through their raw binary data. The identifier for the quantization tables would start with FF DB (in hex), with 00 84 trailing after, which tells the decoder the length of the bytes of the quantization table, in this case being 132 bytes including these 2 bytes. It is then followed by 00, which marks the ID of the table, 00 being the luminance table, and 01 being the chrominance table. Once we have passed these, the next 64 bytes are the actual values of one table.
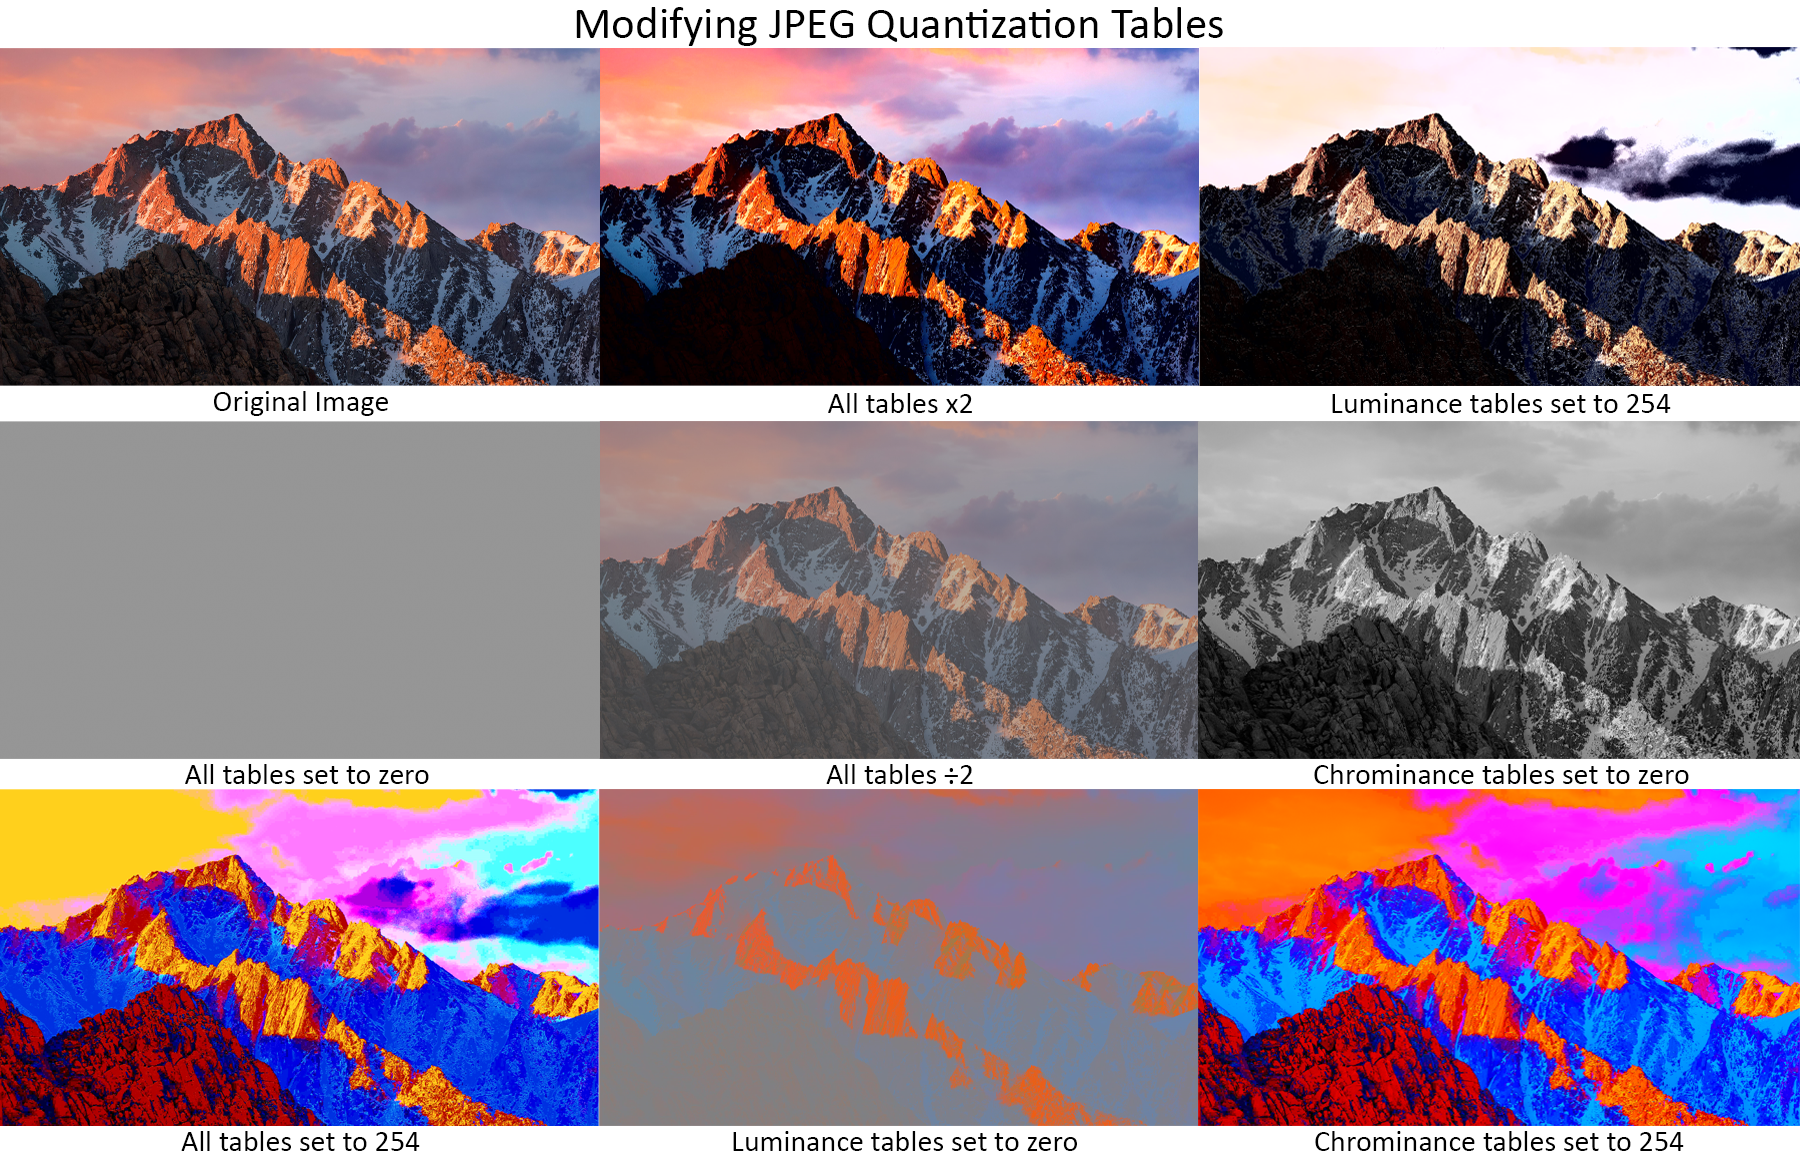
After these, since the length of the segment was 132 including the IDs and data of the bytes, there is another table with the ID of 01, and 64 bytes trailing after it. Using these, I could pinpoint and change the values of the tables to see what the result would be. The attached image of the blog shows what modifiers I used for each image and what its outcome was.
We can see clearly from these images that the luminance and chrominance tables will affect the brightness and colour, but it also shows that modifying these tables can have a significant impact on the overall quality and appearance of the image. By experimenting with different values, you can see how the compression algorithm prioritises different aspects of the image, showcasing the balance between compression efficiency and visual fidelity.
![]() 12th June 2024, 12:09 BST
12th June 2024, 12:09 BST

